


Serrated knives tend to hold their edge longer than straight-edged knives, and are more difficult to restore without changing their shape. For these reasons, it’s best to sharpen your serrated knives only when you notice them becoming less effective. That said, if you’re willing to put in the labor, a cheap handheld tool will do the job.
USING A SHARPENING ROD
 Serrated knives need different sharpeners than straight-edged blades. Most serrated knife sharpeners are rod-shaped, usually with a taper to accommodate different sized serrations. Sharpal 101N and 178N are featured with a tapered diamond rod for serrations.
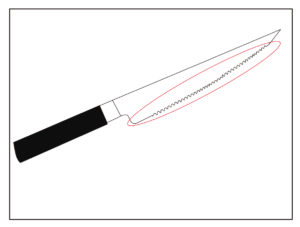
When you begin the sharpening, locate the side of your knife with a beveled edge. Serrated knives generally do not look the same from both sides. On one side, the face of the blade will continue at the same angle until the blade’s edge. On the other, the face of the blade will angle down slightly just before the serrated edge; this is called the bevel. Only apply a sharpening tool to the beveled edge.
 Then, you should place the sharpening rod in one of the serrated scallops (“gullets”). Choosing an angle is easier for serrated blades because you can use the angle of the bevel as a guide. This is typically between 13° and 17° compared to the edge of the blade, which is shallower than you may be used to sharpening knives. If the knife also has a straight edge portion, the bevels are usually ground to the same angle — about 20° to 25°. If you want a better guide, draw on the gullets with a permanent marker. You’ll know you’re hitting them at the right angle if the marker is removed.
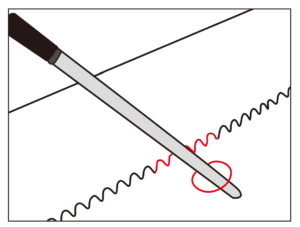
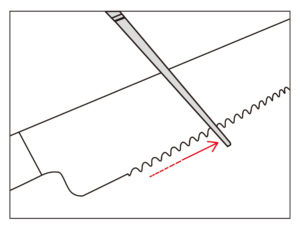
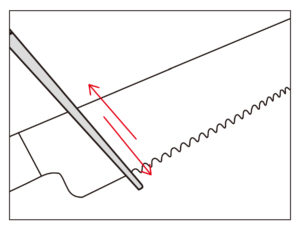 The next step is to move the rod to match the gullet’s diameter. If your sharpening rod is tapered, locate the rod in the gullet at the point where the rod’s diameter is the same size as the gullet’s, or slightly smaller. Then you can run the sharpening rod along the first groove in several short strokes. Push in one direction away from the edge of the blade, toward the spine. Rotate the rod as you push it for a more even grind. You must push only to the point of the rod with the same diameter as the gullet, to avoid enlarging the gullet.
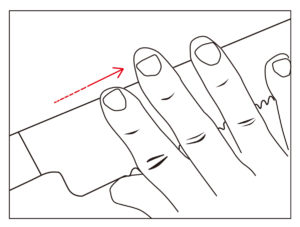
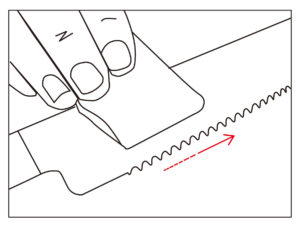
 After sharpening the first gullet, you should run your fingers along the backside of the groove to check for a “burr,” or metal shavings. As soon as you can feel a burr, you have sharpened the groove sufficiently. This often only takes a few strokes. Try running your fingernail along the back edge. If you feel it catch, there’s a burr.
Repeat the same steps to all gullets. If the knife’s serrations are different sizes, adjust the position of the tapered sharpening rod so that the rod just fills the groove.
The final step is to file away all the burrs. To remove them, rub the back of the knife against a sheet of fine-grit sandpaper. As an alternative, you could lightly run the sharpening rod against the backside of each groove, being careful not to apply more pressure than necessary to remove the shavings.
USING OTHER TOOLS
There are other tools such as a triangle-shaped sharpener, a square diamond stone (like Sharpal Credit Card Size Diamond Sharpening Stone) or even a DIY tool that can be used to handle serrated knives. However, they are not professional and reliable, so we do not explain them in detail.